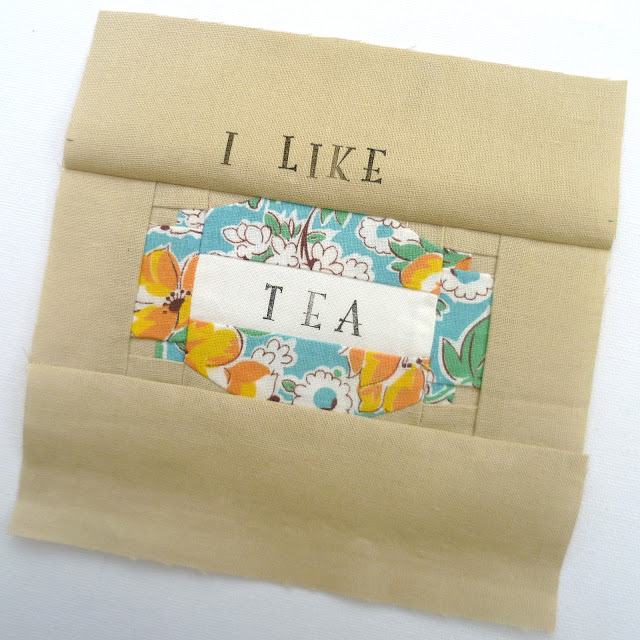
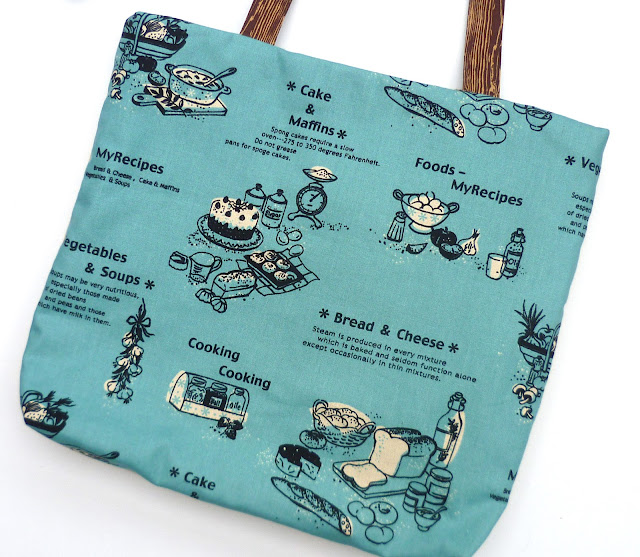
Our new pattern set features three 6 inch blocks and a smaller label block. Penny has already shown you a project for the 'Ode to a KitchenAid block' and 'Vintage Label', so I have come up with a simple tote for the Enamel Coffee Pot, the Tea Kettle and the Vintage label blocks but you could use any 6 inch blocks- we will have more designs coming in the future!
You will need:
- 4 quilt blocks- each measuring 6 1/2 inches square unfinished. My label blocks needed sashing to make them up to 6 1/2 inches
- 1 FQ Sashing background fabric for front. I used Robert Kaufman's Essex linen blend in Sand
- 1FQ fabric for back
- 1/2 Yard Lining fabric
- Just over 1/2 yard interfacing or batting for bag body. I used Vilene fusible fleece H640
- 1/4 yard (long cut) handles fabric- cut into two strips each measuring 4 1/2" x 27"
- Interfacing for the handles-two strips 1 1/8" x 27"
1. Sashing and joining the blocks
Sash the vintage label blocks to make them up to 6 1/2 inches square unfinished. I stamped my strips first (see Penny's stamping tips here) and then added strips to the sides of the label block and then across the top and bottom. Stitch the 4 blocks together and I like to press the seams open. Your front square should measure 12 1/2 inches square. Cut strips for the next stage of sashing. You will need a pair of strips measuring 2 3/4 x 12 1/2" and a pair measuring 2 x 18".
2. Interfacing and quilting
Cut 2 pieces from your interfacing 17 1/2" wide x 16" high. Using a damp clean tea towel, centre the front piece and press to join the layers. Add your smaller side sashing strips, stitching through the front and the interfacing in the seam, press again with a damp cloth. Leave to cool and then quilt throught the layers at the sides.
You can also quilt the pieced blocks if you wish. I stitched an outline around the tea kettle and coffee pot and added a running stitch around the tea and coffee labels. Now add your top sashing strips- these each measure 2" x 18" and quilt. I chose straight-line quilting using the machine foot as a guide. Trim and square up the edges of the bag front.
3. Bag back
I use the front of the bag as my template to cut the back fabric. Press the back fabric to the interfacing and trim. The bag front and back should be the same size. Use front again as a template to cut the lining fabric. You will need two lining pieces.
4. Handles
Take the handles fabric, fold each strip in half long ways and press. I then placed my interfacing so it sat against the centre fold line- press with a damp cloth to attach the interfacing. Then press the outer edges to the centre fold and keeping them tucked in, bring the folded edges into the centre to make a strap just over 1" wide. Stitch close to the edge down both sides.
5. Bag Body
Place bag front and back right sides together and stitch round the sides, I used a 3/8" seam. Press the seam open the best you can, a sleeve board helps for this. Make the gussets at the corners by flattening the corner (wrong side out) so the open side seams line up with the bottom edge side seams. I pin this to hold still whilst I mark where I am going to sew. I went for a small gusset initially- the red line is 2" below and then decided I wanted to go wider.
I ended up going 2 1/2" across.
Check how the gusset looks on the outside before you trim and hopefully your seams will be matching up.
6. Making the lining
If you want a pocket in the bag lining, now is the time to make it. I cut two rectangles, 8" x 9". Place front and back right sides together and stitch around the edge- a 1/4" seam allowance is fine here but leave a 3" gap for turning. Clip the corners, turn through and press.
Top stitch along the top of the pocket edge. Place pocket centrally on the right side of one of the lining pieces, mine was about 4" down from the top edge. Pin and sew around the edges securing well at the ends of the pocket opening.
Place front and back lining pieces together. Stitch around the edges but leave a 6" opening at the centre of the bottom seam. Press the seams open and add the corner gussets as in stage 5.
7. Attaching the Handles
You will need to mark the centre on the front and back of the bag upper edge. On the front the blocks do this for you but on the back place a pin. Pin the handles so there is a 6" gap between them using the centre marks to space this evenly and make sure the handles are lying downwards. Stitch the handle ends securely 1/4" from the bag top edge.
8. Joining bag body and lining
Turn the lining inside out and place the bag body, right side out, inside the lining- right sides of bag and lining should be together. Make sure the handles are facing downwards.
Match up the pressed open seams at the sides and pin all round the top edge. Stitch all round this edge, I used a slightly wider seam allowance of 1/2". Remove pins, press and turn the bag out of the gap at the bottom of the lining.
Sew the lining gap closed. I do this on my machine to make it secure but you could hand stitch if you prefer. Shake the bag out and press around the top edge. Ta dah! Finished!
I should explain the reason the bag is called '#Decisions'. It is a twitter thing- the hash tag is added to different twitter discussion topics- mainly of the fairly trivial variety it has to be said. So my hypothetical topic is which is best- tea or coffee? If only my life were really this simple! Being a Brit I can't live without my tea but I do like a really good coffee, especially Italian ground, how about you?
If you want to find me on Twitter my twitter name is @verykb and I tweet Sew-Ichigo updates and process pics along with other stuff.
And if you make any of our patterns and blocks, do add your pictures to the new Sew-Ichigo Flickr group and we would love to share them here too!


Lovely!
ReplyDeleteI know you wanted to call it '#FIGHT' instead of '#Decisions' though really, didn't you!
You just know my inner mind too well Hadley!
DeleteYour tote is so cute, Kerry! Great tut!
ReplyDeleteSuch a cute tote Kerry! Who could choose between coffee or tea? I know I couldn't I need both! But not at the same time.
ReplyDeleteI know what you mean!
DeleteSuch a sweet tote!! I love the stamping and the paper piecing!! Thanks for sharing!! Can't wait to try it! ;) xo Heather
ReplyDeleteThis is adorable!! I love both any time of the day!
ReplyDeleteCoffee in am and tea afternoon. Make 2 or do both sides?? Thanks for a little excitment. Hope Easter was a delicious & fun one?
ReplyDeleteLove this tote! Of course, coffee wins hands down, but the tea pot is always cuter :)
ReplyDeletethankyou all- it seems tea and coffee are equal at the moment!
ReplyDeleteKerry, this is just wonderful! Coffee or tea - that is a hard decision!
ReplyDeleteTea most of the time but can't live without the oomph hat I get from a good strong coffee !
DeleteLove, love, love!! You make the prettiest things, Kerry!! I actually prefer green tea over tea or coffee... but that is out of the question! Thank you so much for the tutorial!!
ReplyDeleteI cant always drink green tea, it never tastes the same as when I drink in a Japanese restaurant when I make it at home!
DeleteThank you so much for a wonderful tutorial. I just bought the pattern from your shop. I'm totally in love with these designs. :)
ReplyDelete