Friday 6 July 2012

Order both, save some dough at Sew-Ichigo!


Kerry and I have decided to offer you all a special discount if you order both the Button It and Rainbow Rack of Spools sets.  They are $5.50 USD each, or $9 USD for both.  Ordering info here!

Thursday 5 July 2012

NEW! 'Rainbow Rack of Spools' and 'Button It' sets


You can purchase both sets here!  There is a discount for buying them together!
We'll be posting a couple of projects (which modify patterns by Ayumi) in the next few days using both pattern sets, but for now, here's a sneak peek!


Monday 2 July 2012

Y-seam tips: Version 2

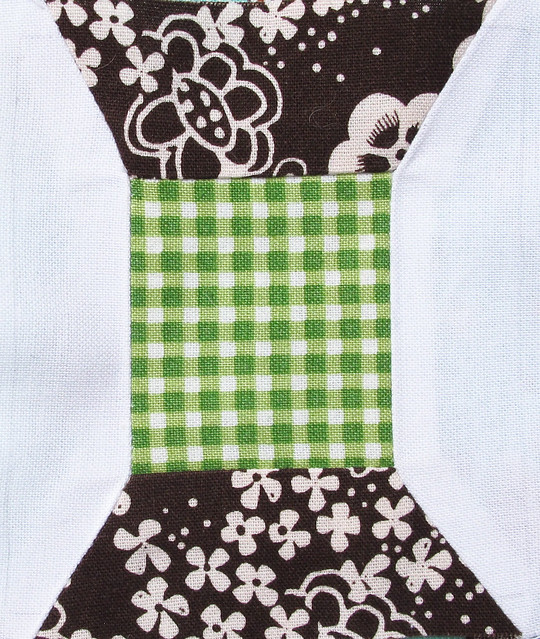
Today I'm going to walk you through how to sew a Y-seam using one of Kerry's spool blocks (in which the pattern will be available in a few short days!)  In this version, I will not be using freezer paper, and part of the block will be semi-foundation pieced.


Kerry has given some really great info in Version 1 on how to spot Y-seams in a finished block and how to do Y-seams using freezer paper, so make sure and check her version out as well!


What you will need:

Your fabrics, the pattern (which has the side Y-seam portions cut off the spool), pencil, rotary cutter, mat, and a small clear ruler.

First, foundation piece the spool.  When you sew this part, start and end sewing exactly where the line on the pattern starts and ends.


Once you have the spool pieced on both ends, use your ruler and a pencil and draw a line 1/4" out from the edges of the spool.


then use your rotary cutter to cut the spool out along the penciled line.


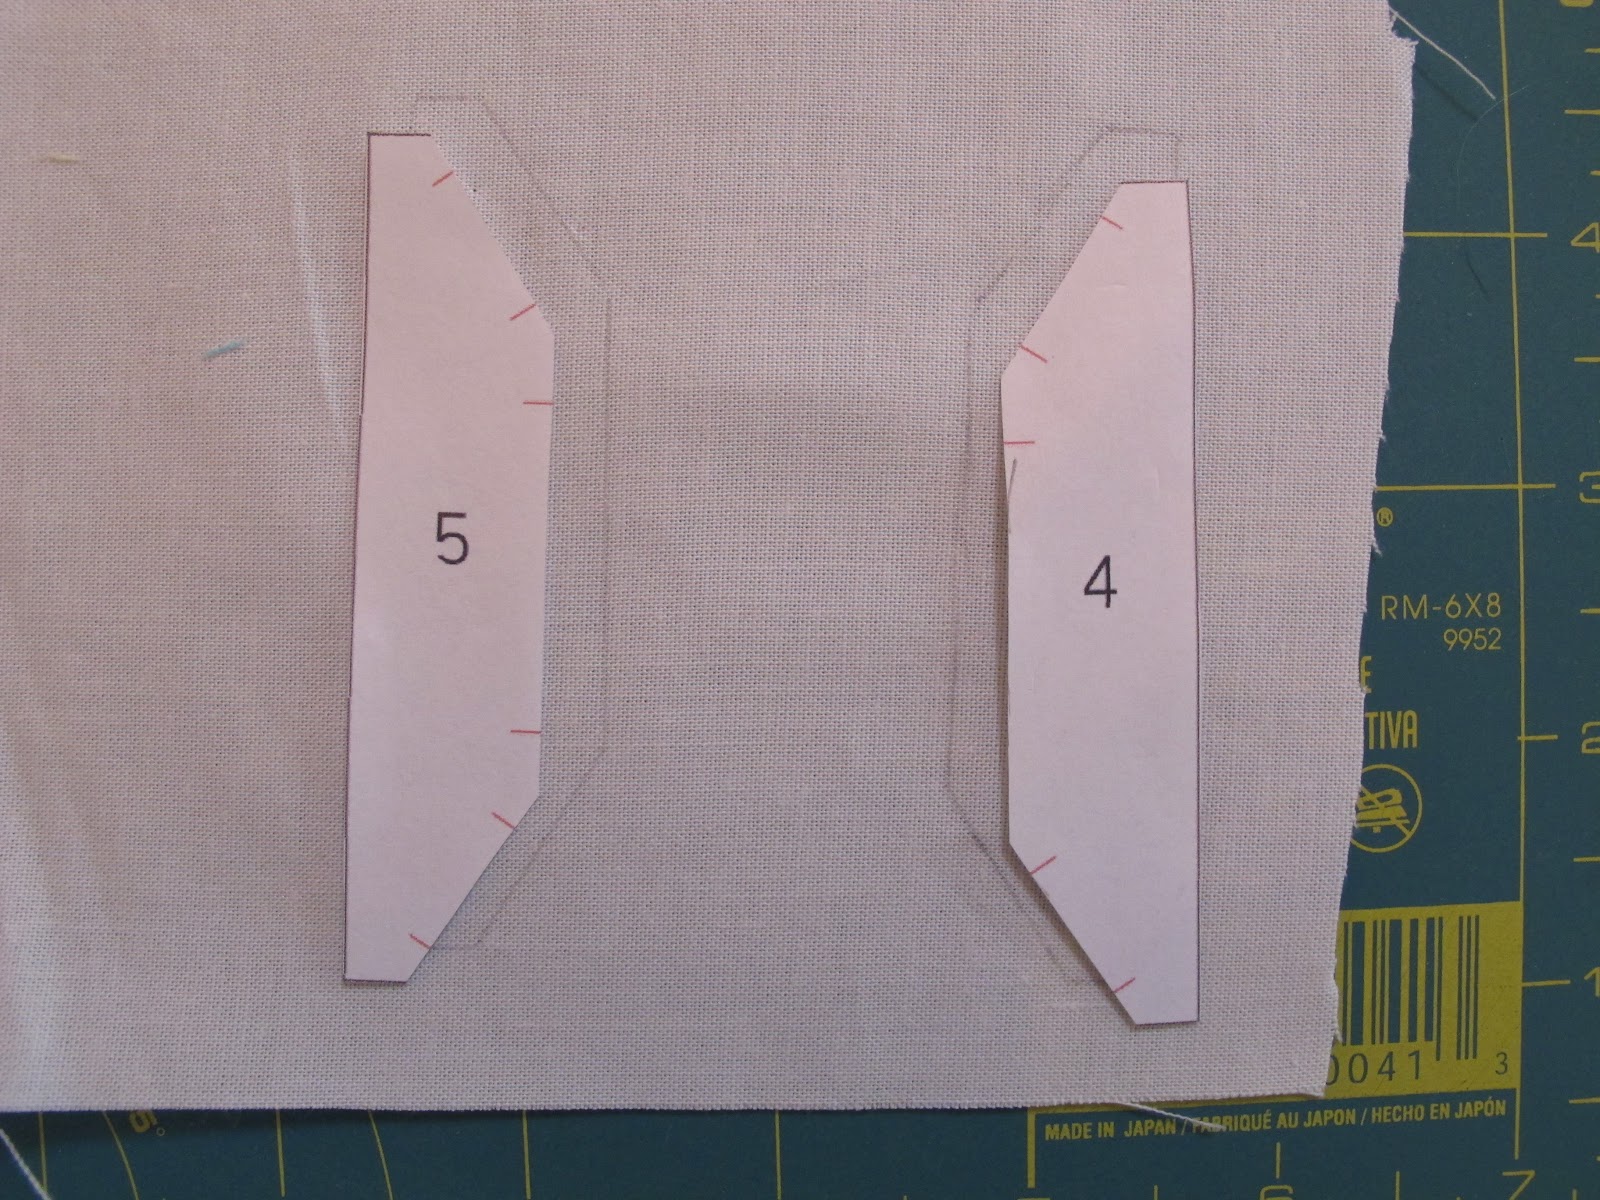
Trace your side template pieces onto fabric

and then use your ruler and rotary cutter to cut them out 1/4" past the penciled lines.


Now lay the side template onto the spool, lining up the side and top and bottom edges with the spool.


Pin in place if you wish (I didn't) and flip the piece over and sew just to the side of the paper pattern from the top stitch line to the bottom stitch line.  Repeat on the other side.

Now flip the piece over and pin the two edges together on one corner, indicated by the black arrow.   The red arrows indicate which edges you are pinning together.  When pinned, you can see that the piece is pulled up on that corner.


Starting sewing at the outside edge corner until you reach the stitching corner indicated by the blue arrows.   Stop sewing exactly where the the side stitches stop.  Repeat for the other three corners.


Press your side seams open on the back, and you are done!

Sunday 1 July 2012

Y seams Tips: Version 1

I love a Y seam!  Spool blocks are full of them, and in preparation for one of our new pattern sets, Rainbow Rack of Spools, Penny and I thought we would give you our Y seam tips and I am up first!  Y seams occur when three seams intersect and form a Y shape.  You cannot piece Y seams entirely with foundation paper piecing so my preference is for freezer paper piecing.  This traditional 'Windblown Star' block has a couple of Y seams in it.  Can you see them in the first pic?
They are easier to spot when the block is rotated 90 degrees.  I have highlighted one in yellow.
They are a useful way to reduce the number of separate pieces and additional seams in a block.  You can see one in the roof/chimney/sky area of this little house- pattern is available in Fat Quarterly Community Retreat issue available here with my detailed 'how to sew Y seams feature'.
There are four Y seams on each of my spool blocks, I have highlighted one here.
They are not hard but they are fiddly and they do call for precise sewing.  I use a small stitch, a fine piecing thread like Aurifil 50wt and you will need to secure at the beginning and end of each seam with back stitches.  I use my template freezer paper pattern pieced as guides for my seams.  You start by piecing the centre of the spool to the spool tops, but look carefully at the seams below.
 Did you notice how they stop 1/4" away from from the outside edge on each side?
This is repeated all round the spool until all the outer pieces- the spool top and bottom, plus the side background pieces- are attached making an inner square of seams.  
Now sew your diagonal seams, starting at the outer edge and sewing inwards- I find this brings me the best results, but if you wish to try the other way, I won't stop you.
I f you sew a stitch over at a vital intersection, reposition your needle to where you want to be and secure with back stitches, unpick the unwanted stitch.  That's how I sew my Y seams.  The tick marks are a great help on these.  The more you sew them, the better you get- practice as always makes perfect!

Counter

you might like...